Build OpenCV With Visual Studio and CMake GUI
February 25, 2023 • C++ OpenCV Visual Studio CMake • 6 minutes to read • Edit

If you want to use the command line approach, check out my other blog - Build OpenCV With Visual Studio and CMake CLI.
If you have ever used OpenCV, you would know that it is a very powerful library for image processing. This is owing to ease in usage and availability of multiple functions which can be utilised to perform a variety of image processing tasks. In this post, we will explore the steps on how to build OpenCV with Visual Studio and Cmake GUI.
There are two sections to this blog:
- Generating OpenCV build files using CMake GUI
- Building OpenCV using Visual Studio 2022 Community
Table of Contents
- Prerequisites
- Section 1: Generating OpenCV build files using CMake GUI
- Section 2: Building OpenCV using Visual Studio 2022 Community
- Few tips and tricks
- Conclusion
Prerequisites
Before we begin, you need to have the following on your computer:
- Visual Studio 2022 Community with C++ support
- CMake - I am using CMake 3.24.
- OpenCV - I am using OpenCV 4.7.0.
- Python - I am using Python 3.10.
Note: Though, CMake is installed with Visual Studio, I would also recommend installing it separately. This will make it easier to use CMake with other IDEs.
Section 1: Generating OpenCV build files using CMake GUI
Fun part! Let’s build OpenCV.
Step 1: Know where to find the files
First, find the location of VSC Compiler and CMake. VSC uses cl.exe as the compiler and CMake GUI uses cmake-gui.exe. You can find these files in the following locations:
- For Visual Studio 2022 Community -
C:\Program Files\Microsoft Visual Studio\2022\Community\VC\Tools\MSVC\14.34.31933\bin\Hostx64\x64\cl.exe - For CMake -
C:\Program Files\CMake\bin\cmake-gui.exe
Note: The version of the compiler could be different. You can find the version of the compiler in -
C:\Program Files\Microsoft Visual Studio\2022\Community\VC\Auxiliary\Build\Microsoft.VCToolsVersion.default.txt. Or, you can also select the latest compiler fromC:\Program Files\Microsoft Visual Studio\2022\Community\VC\Tools\MSVC\.
Step 2: Download OpenCV
Download OpenCV from https://opencv.org/releases. As mentioned previously, I am using OpenCV 4.7.0. You can use any version of OpenCV that you like. Extract the zip file to a location of your choice. I am extracting it to C:\Users\<user>\Downloads\opencv-4.7.0. Open the extracted folder and create a new folder called build. This is where the build files will be generated.
Step 3: Open CMake GUI
Open CMake GUI. You can find it in the following location - C:\Program Files\CMake\bin\cmake-gui.exe. You can also search for it in the start menu. Once you open it, you will see the following screen:
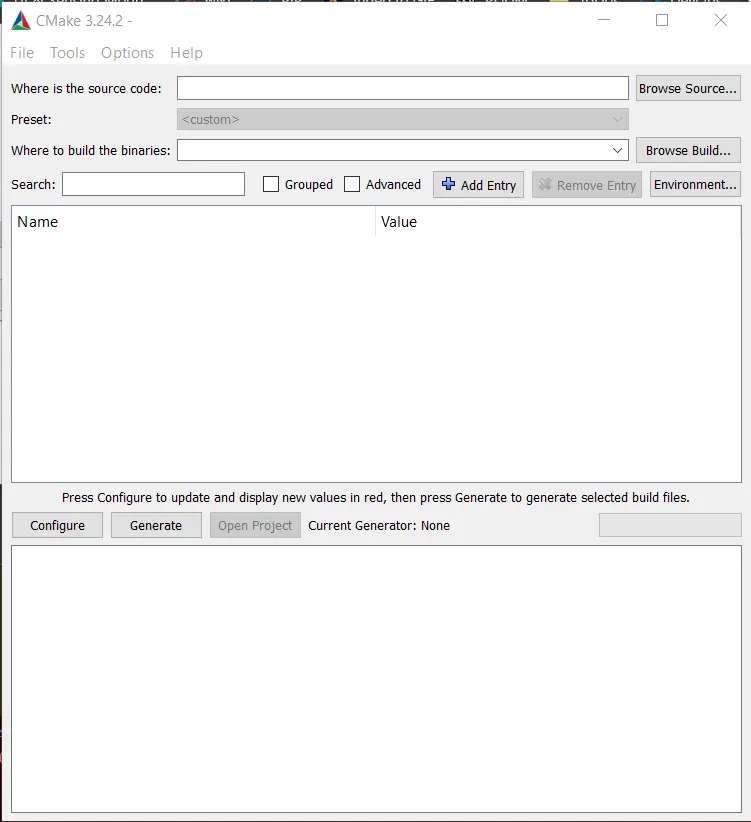
CMake GUI
Step 4: Set the source and build directories
Now, let’s set the source and build directories.
- Source Directory -
C:\Users\<user>\Downloads\opencv-4.7.0 - Build Directory -
C:\Users\<user>\Downloads\opencv-4.7.0\build
This is how it should look like:
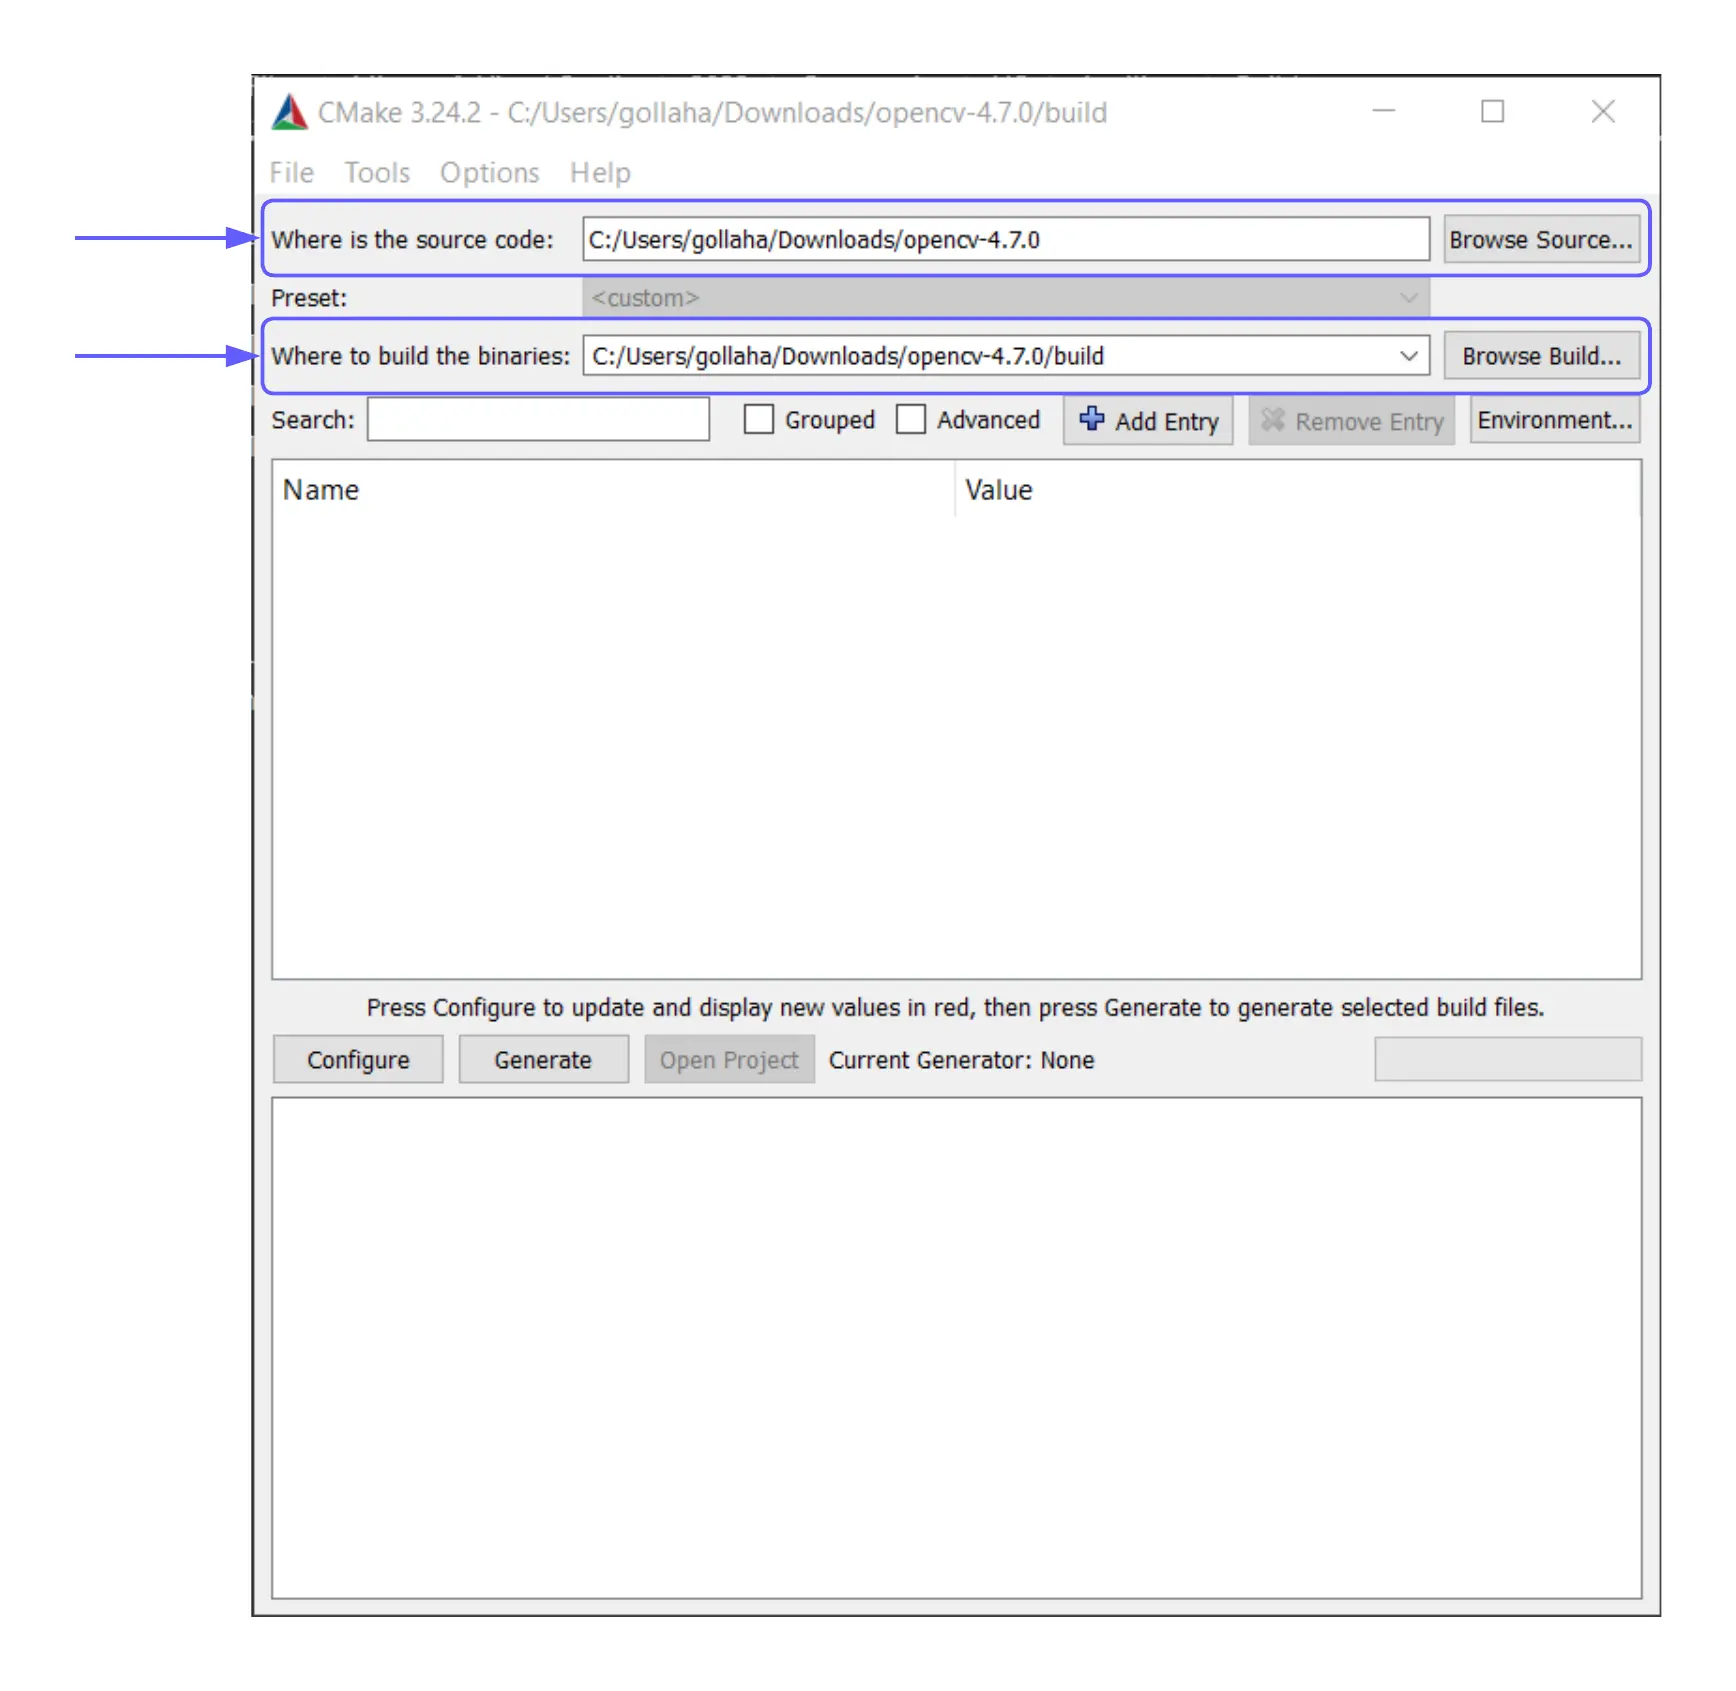
CMake GUI Source and Build Path
Step 5: Configure build and compiler settings
In this step, we will configure the build with appropriate compiler location.
- Click on
Configure, this should open a pop-up window. SelectVisual Studio 17 2022and from the options, selectSpecify native compilers. This should look like:
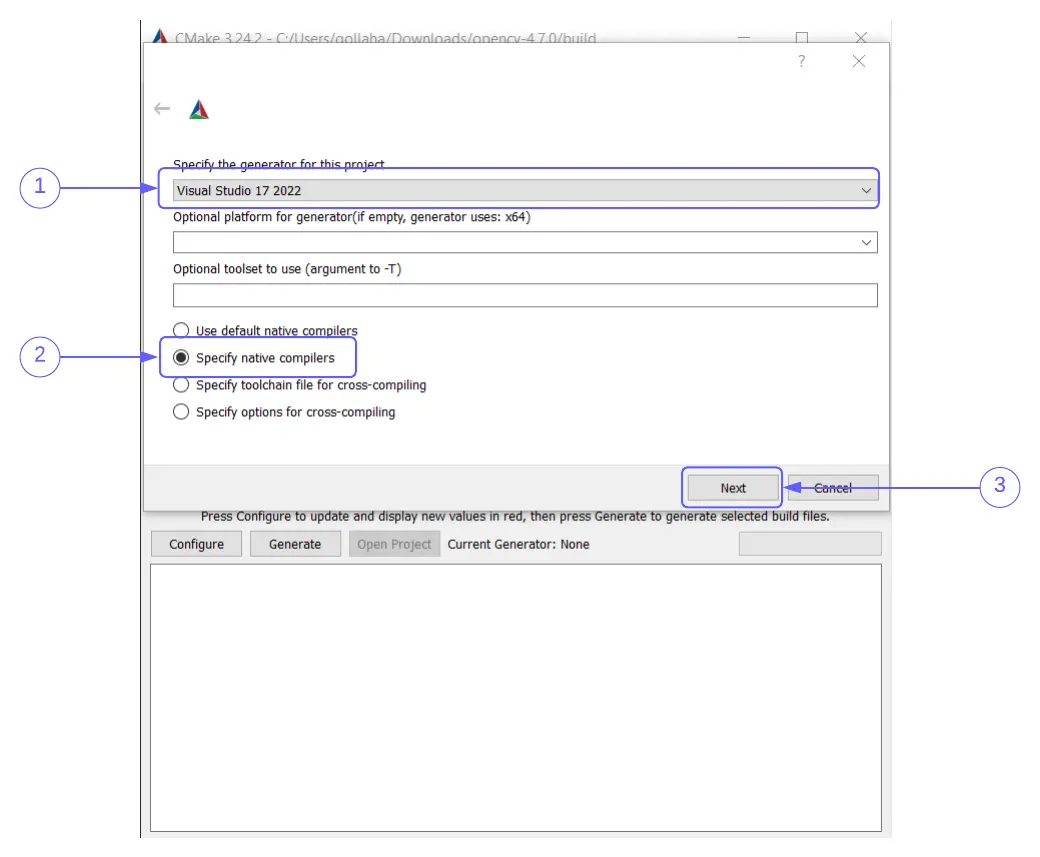
CMake GUI Configure Generator
- Select Visual Studio 17 2022 from the drop down. 2. Select “Specify native compilers”. 3. Click “Next” to go to next screen
- Now, click on
Next. This should take you to a place where you can set the native compiler location. Remember thecl.exelocation? That’s what we have to set here. Set the following variables:- Under
CandC++fields, set it toC:\Program Files\Microsoft Visual Studio\2022\Community\VC\Tools\MSVC\14.34.31933\bin\Hostx64\x64\cl.exe
- Under
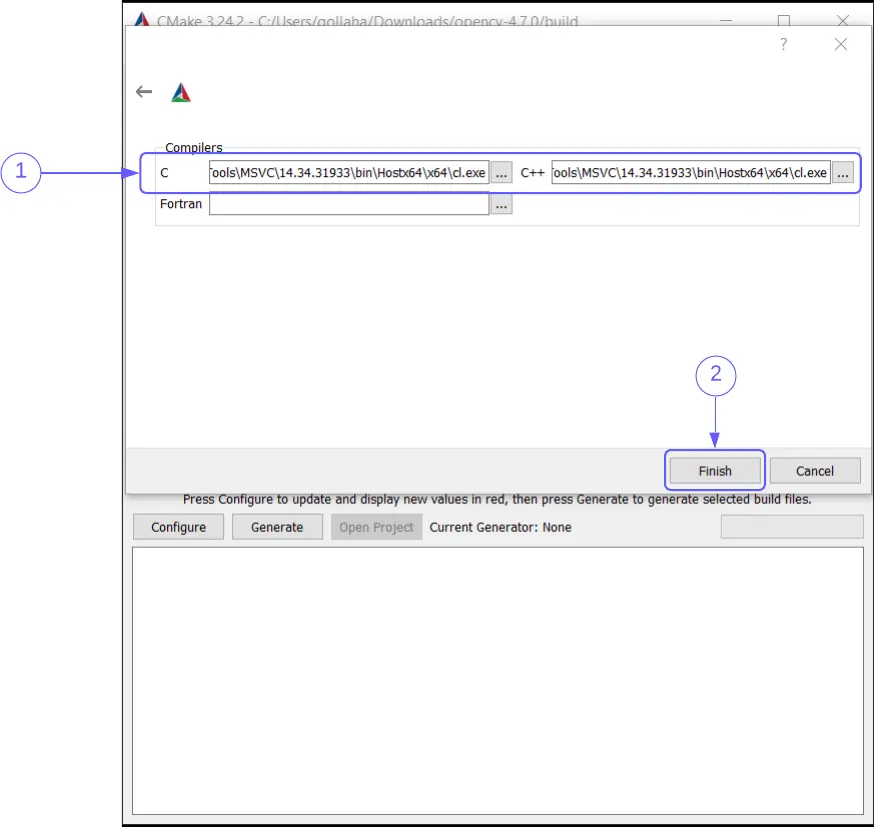
CMake GUI Configure Compiler
- Add in the compiler path. And 2. Click “Finish”
And finally, click on Finish. This should take you back to the CMake GUI window and generate the build files. This will take some time; and should look like:
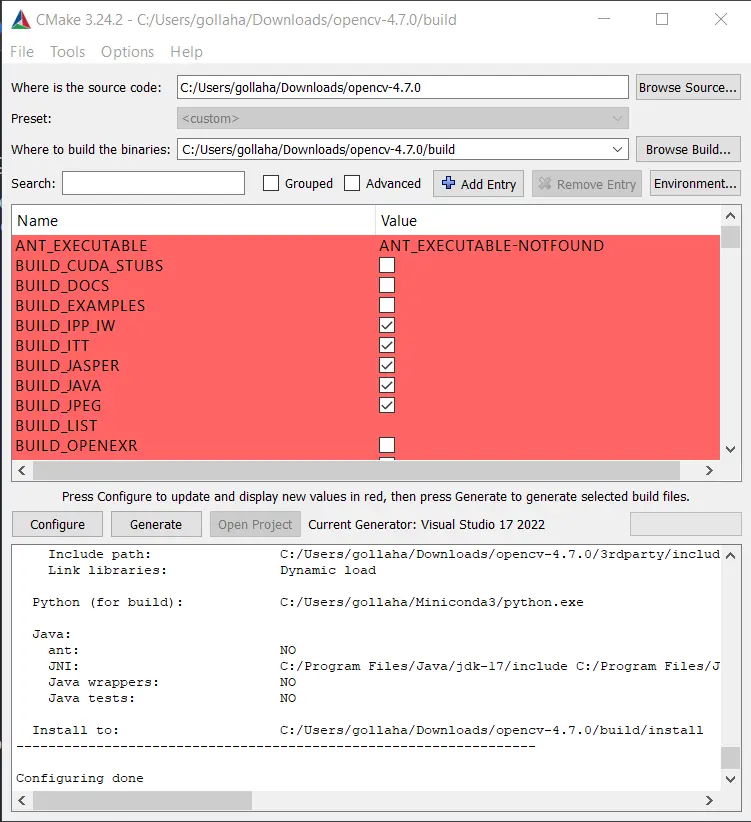
CMake GUI Configure
Note: Create a folder called
installin the build directory, if it does not exist.
Step 6: Set install location and generate build files
In the search field, search for CMAKE_INSTALL_PREFIX. Edit CMAKE_INSTALL_PREFIX value by double-clicking on it and set it to C:\Users\<user>\Downloads\opencv-4.7.0\build\install. This should look like:
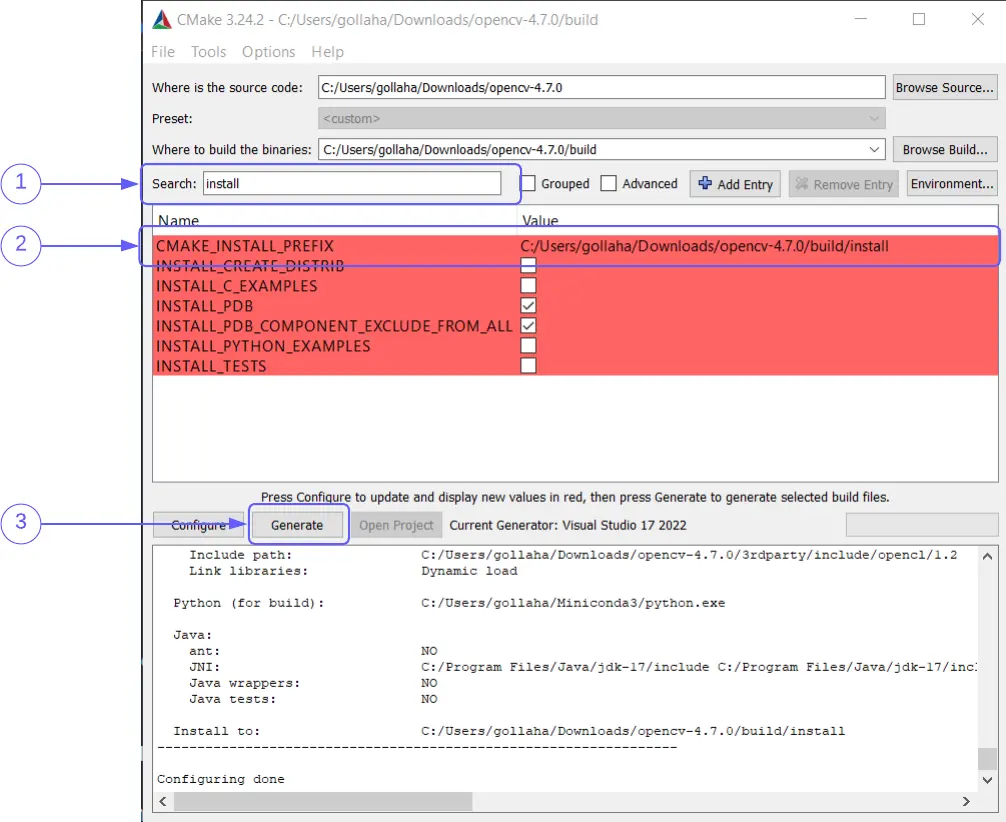
CMake GUI Configure Installation Path
- In the search field, type in “install”. 2. Edit “CMAKE_INSTALL_PREFIX” to add the install path. 3. Click “Generate”
Once you have setup the install path, click on Generate. This should generate Visual Studio solution files.
Section 2: Building OpenCV using Visual Studio 2022 Community
Warning: This will take a lot of time. So, go grab a cup of coffee (or even tea).
Once the Visual Studio solution files are generated, you can either click on Open Project, beside the Generate button. Or go to C:/Users/<user>/Downloads/opencv-4.7.0/build and click OpenCV.sln. This should open Visual Studio 2022 Community.
In your solutions explorer, under CMakeTargets, you should see INSTALL. Right-click on INSTALL and select Build. This should build OpenCV.
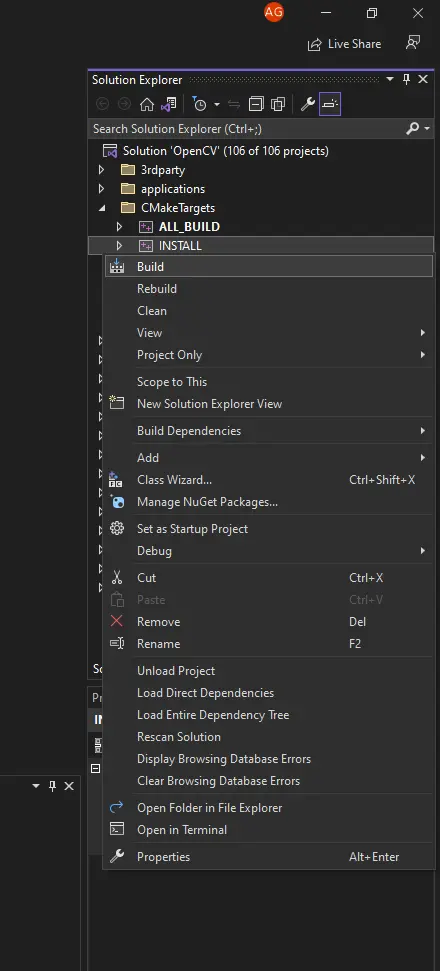
Visual Studio Build
Once the build is complete, you can find the OpenCV files/binaries in the following locations:
- Include files -
C:\Users\<user>\Downloads\opencv-4.7.0\build\install\include\opencv2 - Binaries -
C:\Users\<user>\Downloads\opencv-4.7.0\build\install\x64\vc17\bin - Libraries -
C:\Users\<user>\Downloads\opencv-4.7.0\build\install\x64\vc17\lib
Few tips and tricks
These are some tips and tricks that I have learnt while building OpenCV using Visual Studio 2022 Community and CMake GUI.
CMake for Visual Studio
CMake for Visual Studio can be found in - C:\Program Files\Microsoft Visual Studio\2022\Community\Common7\IDE\CommonExtensions\Microsoft\CMake
An alternate way to set compiler location
As an alternative to Step 5, we can manually set the compiler location in the environment variables. Do the following:
For the compiler, click on Environment button on top right of the window and set the following variables:
CMAKE_CXX_COMPILER-C:\Program Files\Microsoft Visual Studio\2022\Community\VC\Tools\MSVC\14.34.31933\bin\Hostx64\x64\cl.exeCMAKE_C_COMPILER-C:\Program Files\Microsoft Visual Studio\2022\Community\VC\Tools\MSVC\14.34.31933\bin\Hostx64\x64\cl.exe
These should look like:
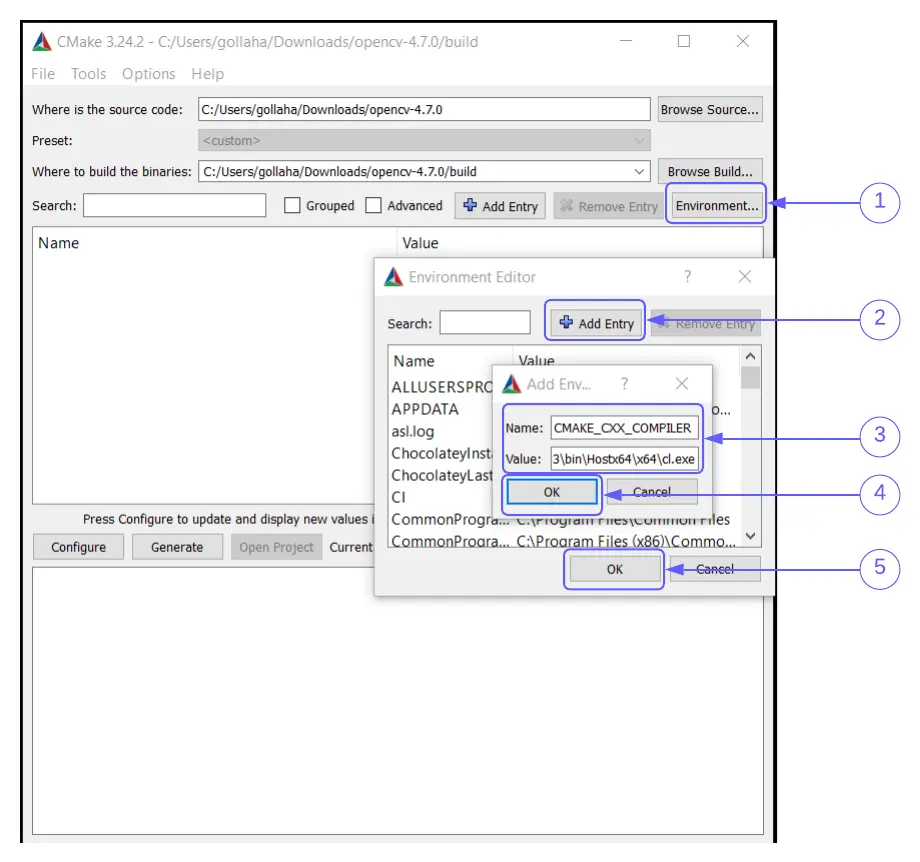
CMake GUI set compiler environment variables
- Click on “Environment” button, this will open “Environment Editor”. 2. Click on “+ Add Entry”. 3. Edit “Name” and “Value” with the compiler type and path. 4. Click on “OK” to save and close the window. 5. Once, both variables are added click on “OK” in “Environment Editor”.
And finally, click on option Use default native compilers and click on Finish.
Build opencv_world library
By default, CMake will build individual libraries for each module. If you want to build a single library, you can do the following:
- In the search field, search for
BUILD_opencv_world. Click on the checkbox to enable it. This should look like:
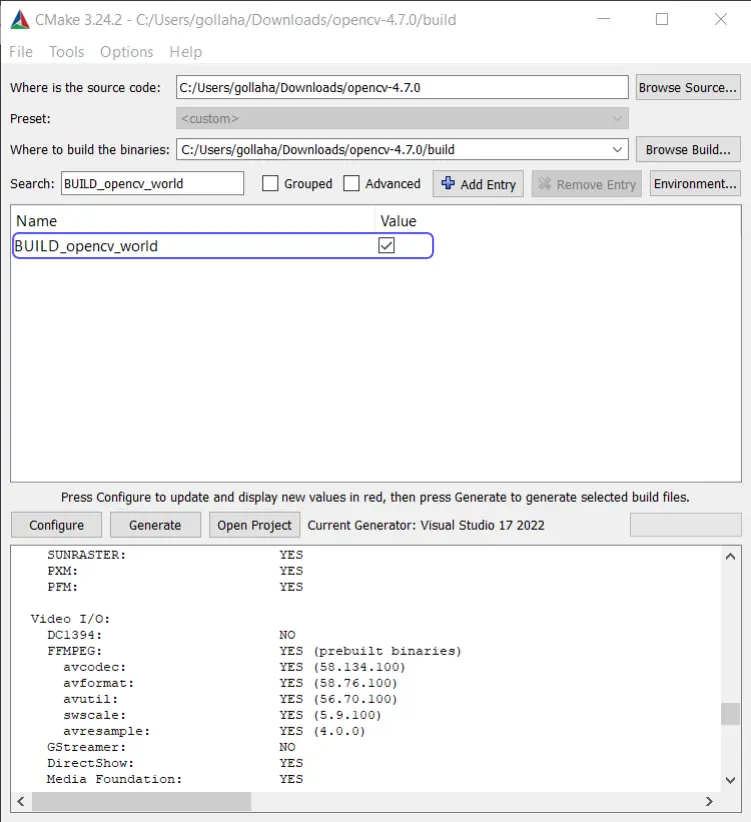
CMake GUI build opencv_world
- Click on
Configureand thenGenerate. This should generate the build files. Now, you can build theINSTALLtarget as mentioned in Building OpenCV using Visual Studio 2022 Community.
Conclusion
So now, we have seen how to build OpenCV using Visual Studio 2022 Community and CMake GUI. We have also seen how to set up the environment variables for CMake to use the compiler. I hope you found this article useful. If you have any questions, feel free to ask them in the comments section below.
Until next time, happy coding!
Update
- Added link to Build OpenCV With Visual Studio and CMake CLI.
- Changed “Part 1” to “Section 1” and “Part 2” to “Section 2”.
