Azure AD B2C has been so far good, mostly because of the 50k free user authentication 😇, also it just works. The problem I had using B2C with backend was acquiring and testing tokens in development.
Yes, Azure AD B2C has Resource Owner Password Credential (ROPC) flow that allows you to get tokens by just posting your username and password, but they don’t recommend it. Though, I have been using that locally to get the tokens.
With the new update of Postman (version 8+), it’s easy to set OAuth 2.0 based authentication.
So, let’s set it up.
Setup Azure AD B2C
Note: This article assumes that you have basic knowledge about OAuth 2.0 and Azure AD B2C
Before we get the tokens, we should tell Azure AD B2C that we want to authenticate using Authorisation code flow with Proof Key for Code Exchanged (PKCE).
At the time of writing this article, Azure AD B2C supports the following platforms:
Web applications
Web
Single-page application
Mobile and desktop application
iOS/macOS
Android
Mobile and desktop application
For web applications you need client security code because as far as I have tested it, it doesn’t work with PKCE. I chose - Mobile and desktop application - because Postman is a desktop application. Let’s add a platform first:
In Azure AD B2C directory, select - App registrations - from the left menu
Under Owned applications tab, select your application.
From the left menu, under Manage section, select Authentication
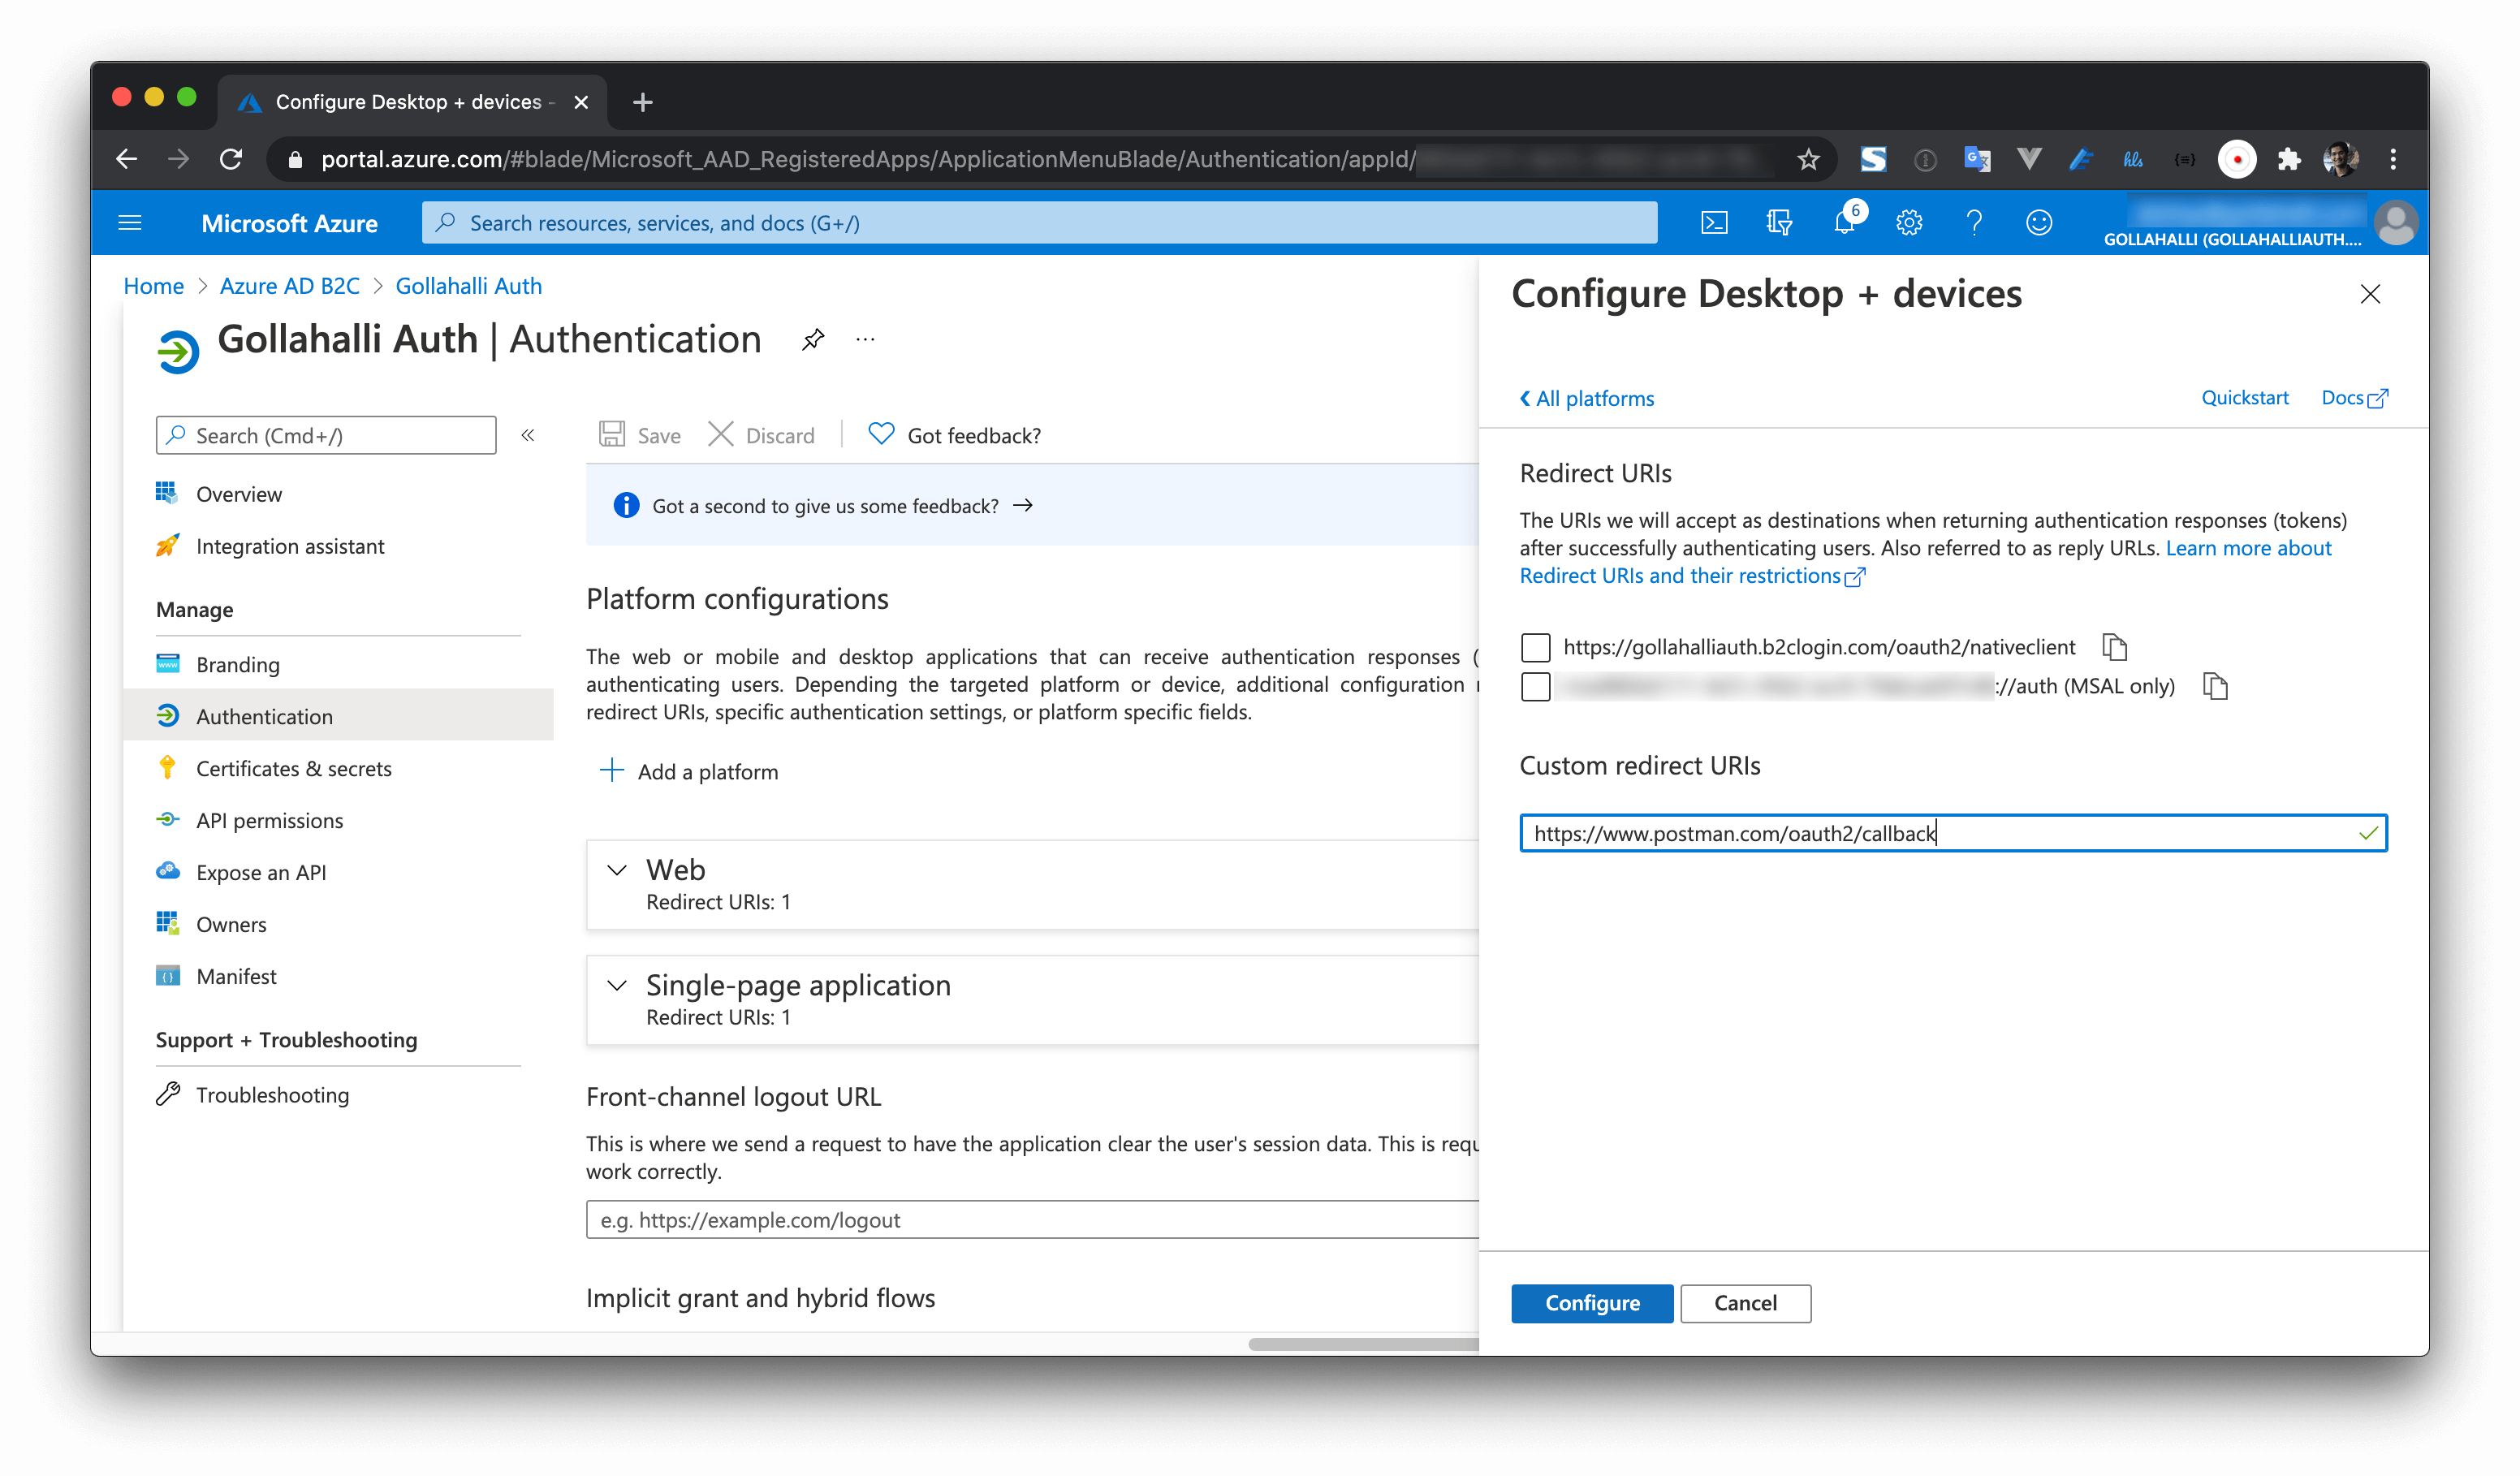
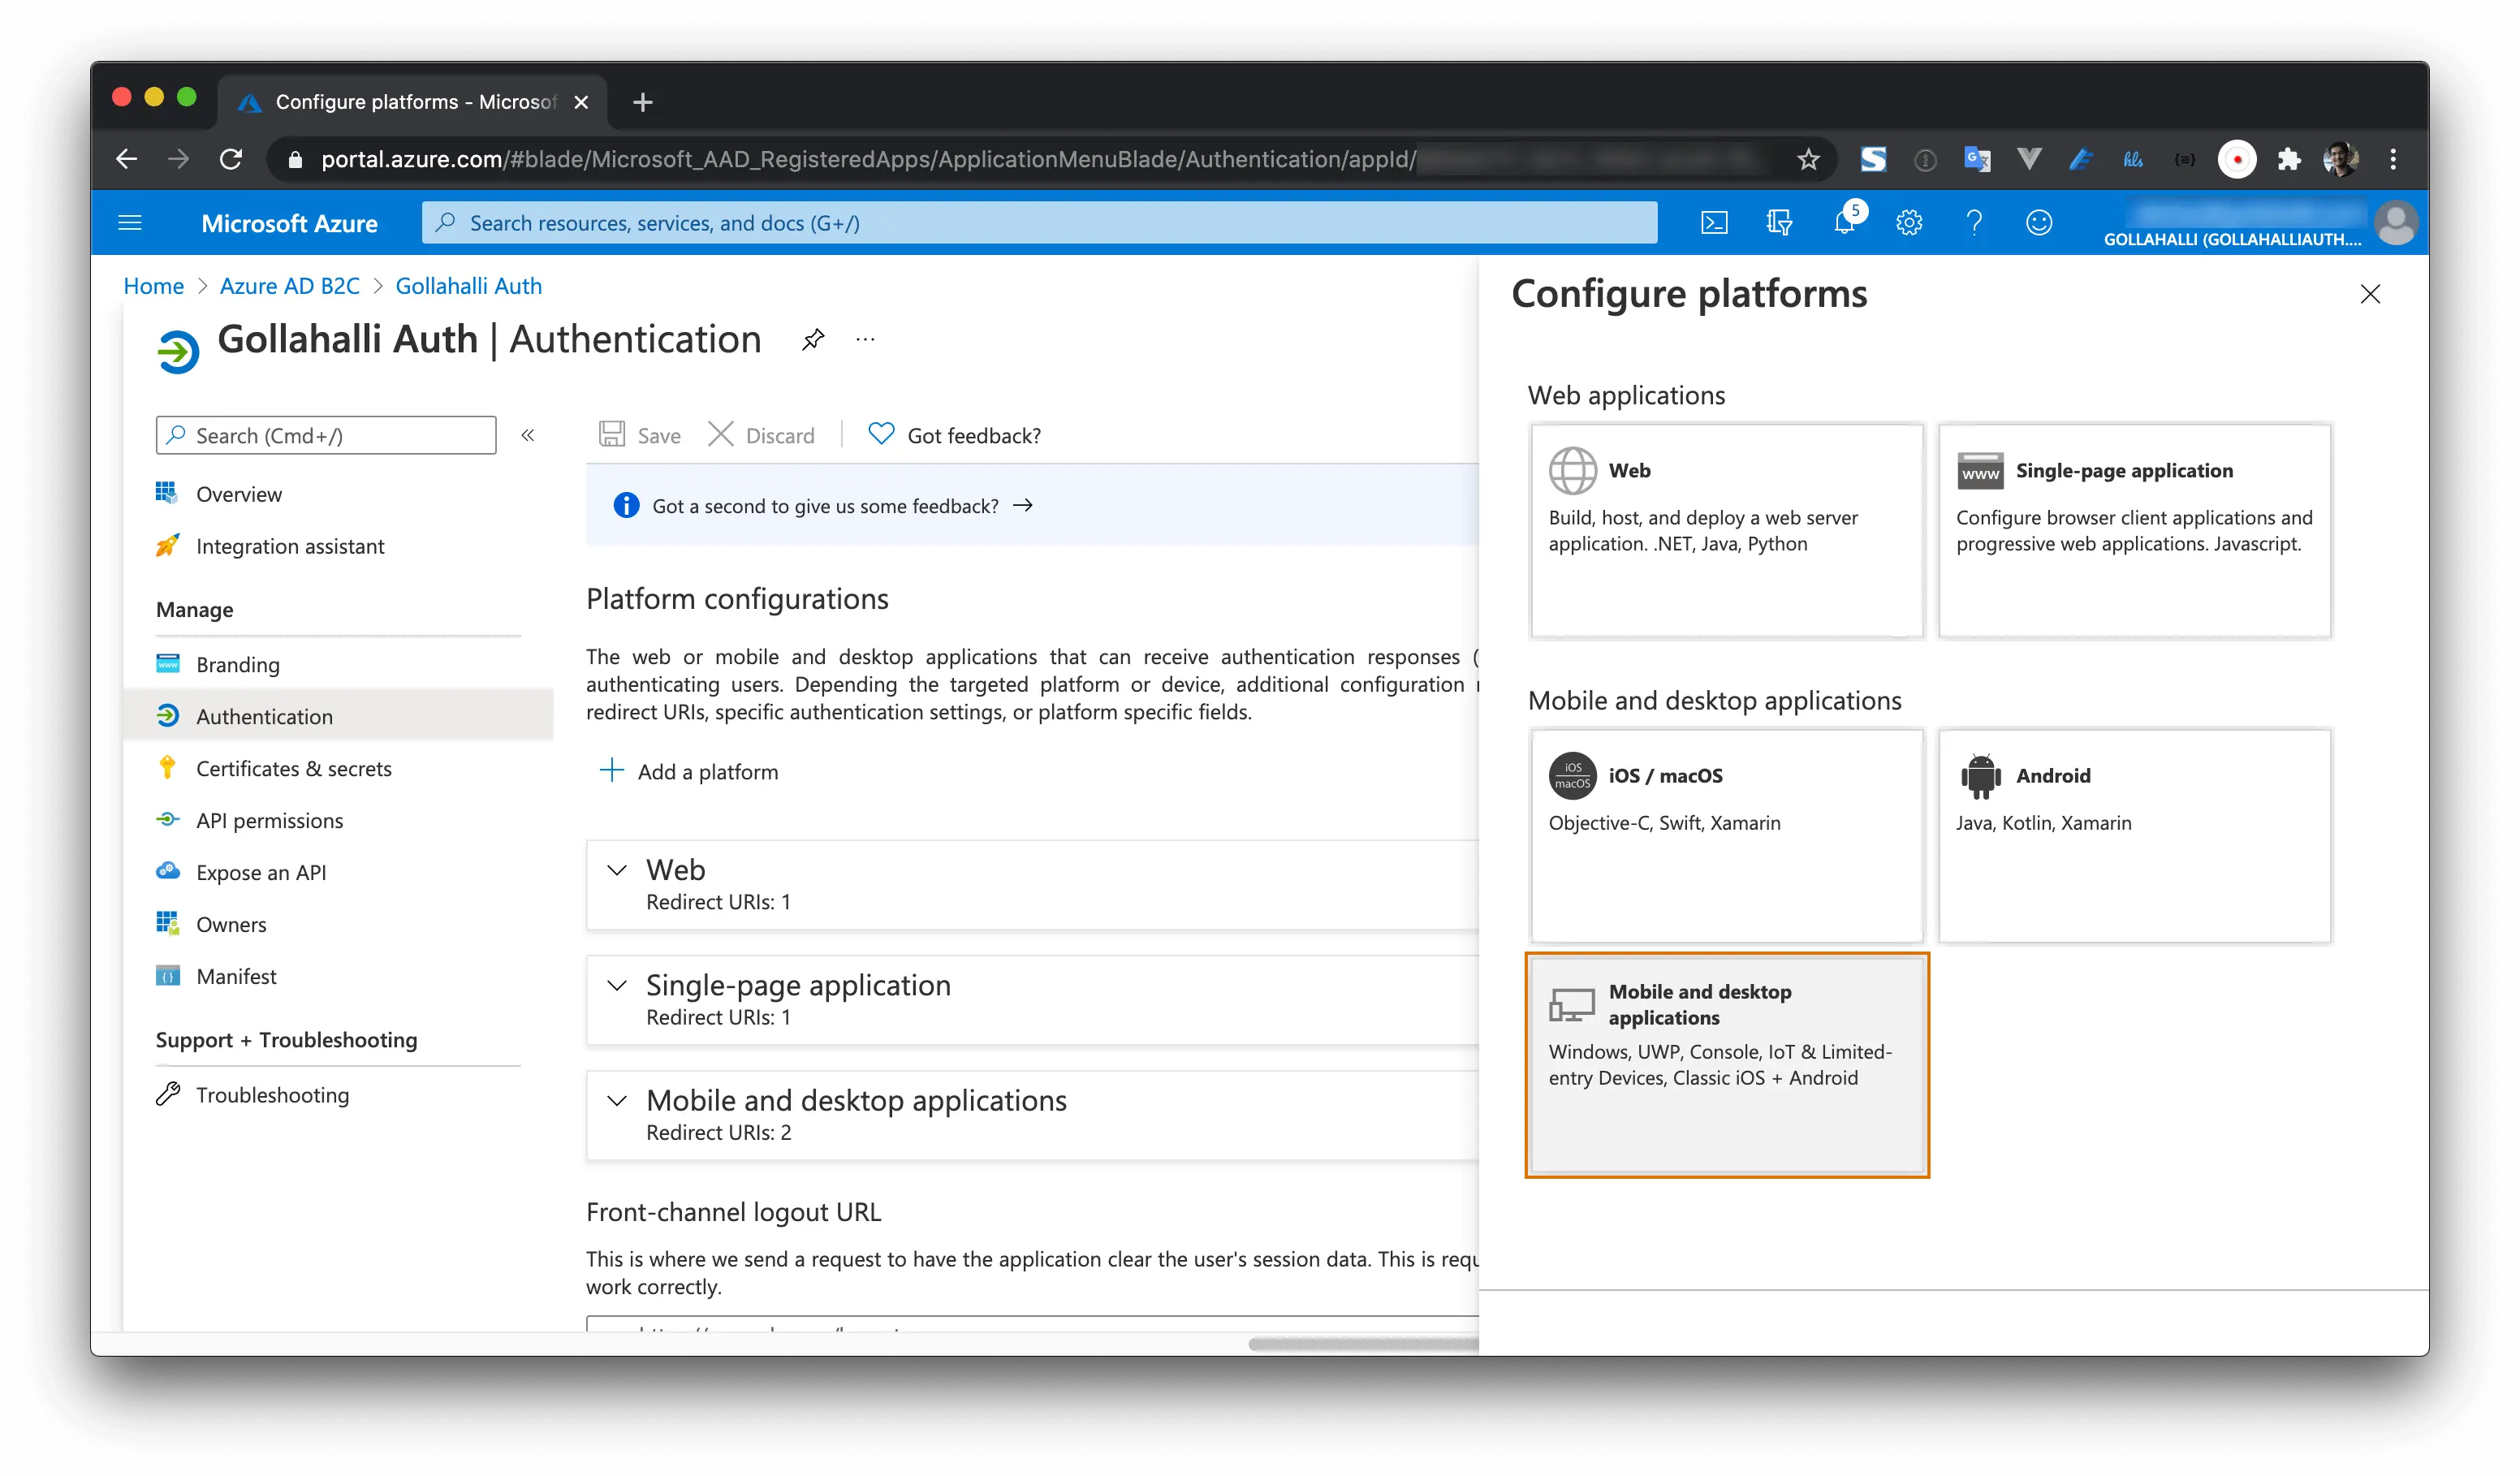
Under - Platform configurations - click on Add a platform. This should open a drawer from right.
Add a new platform
select the - Mobile and desktop applications.
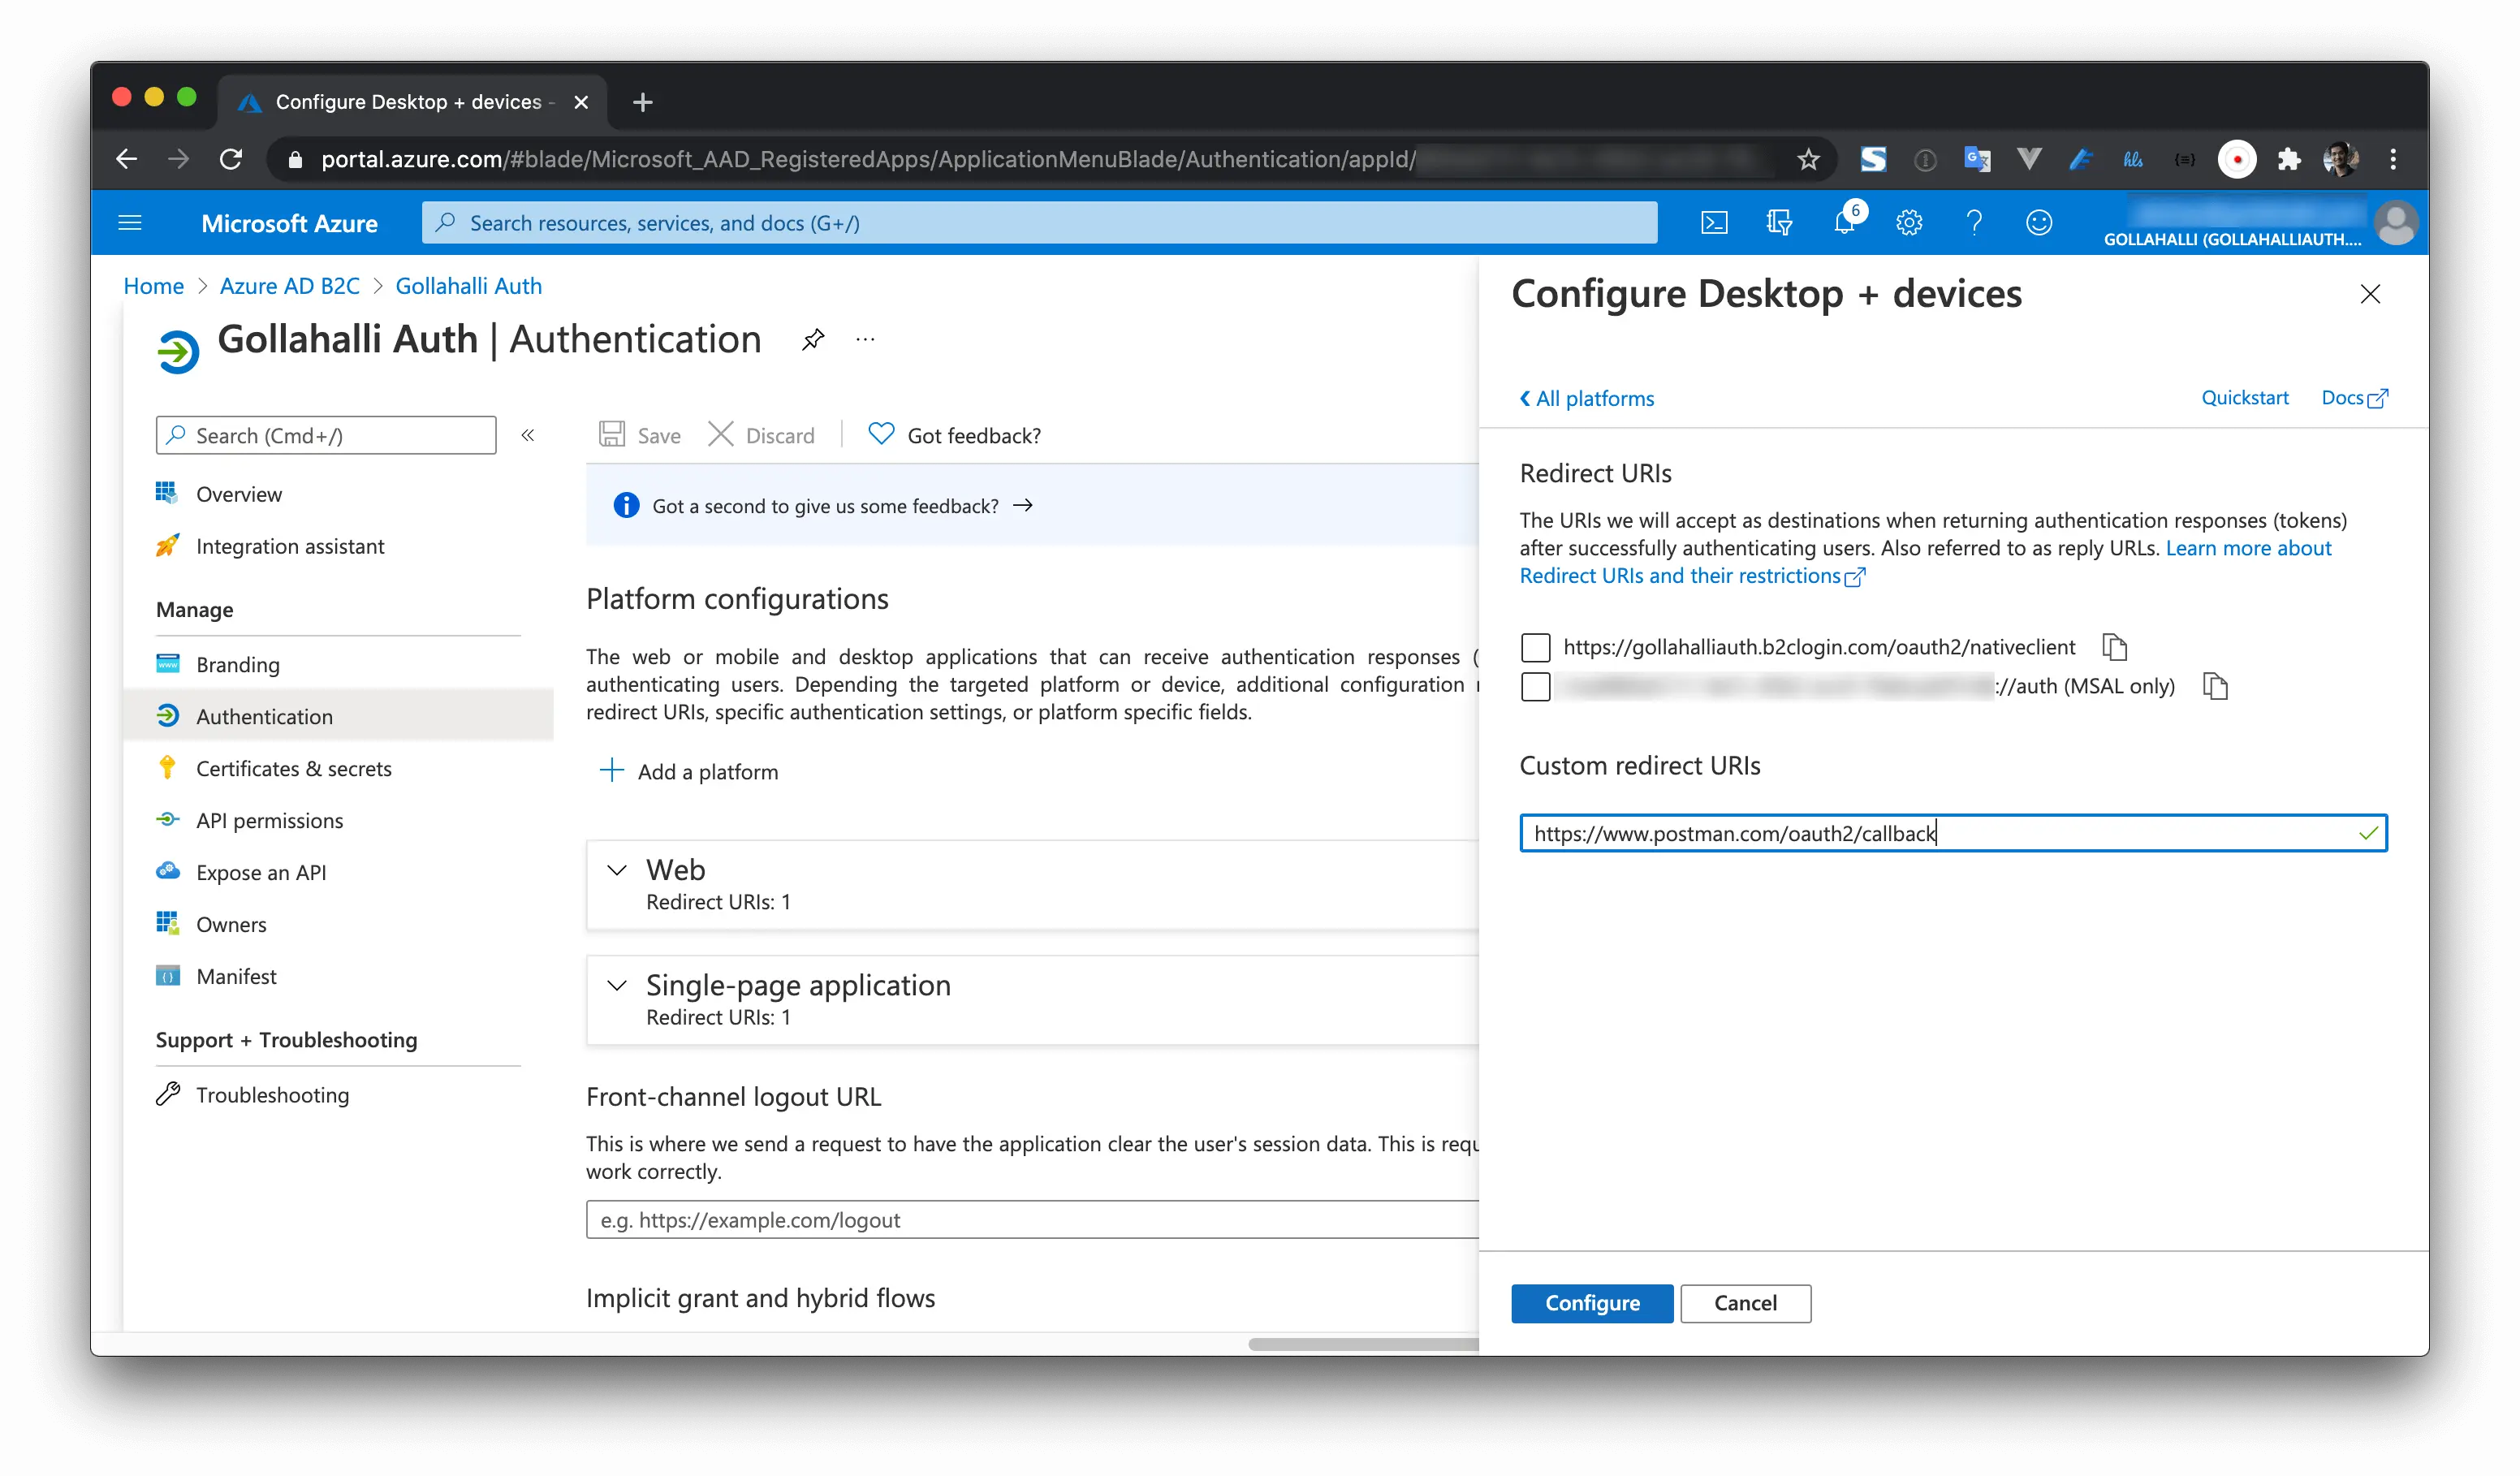
According to their documentation, the callback URL should be - https://oauth.pstmn.io/v1/callback, add that and click Configure.
Adding callback URL
This will create the appropriate platform.
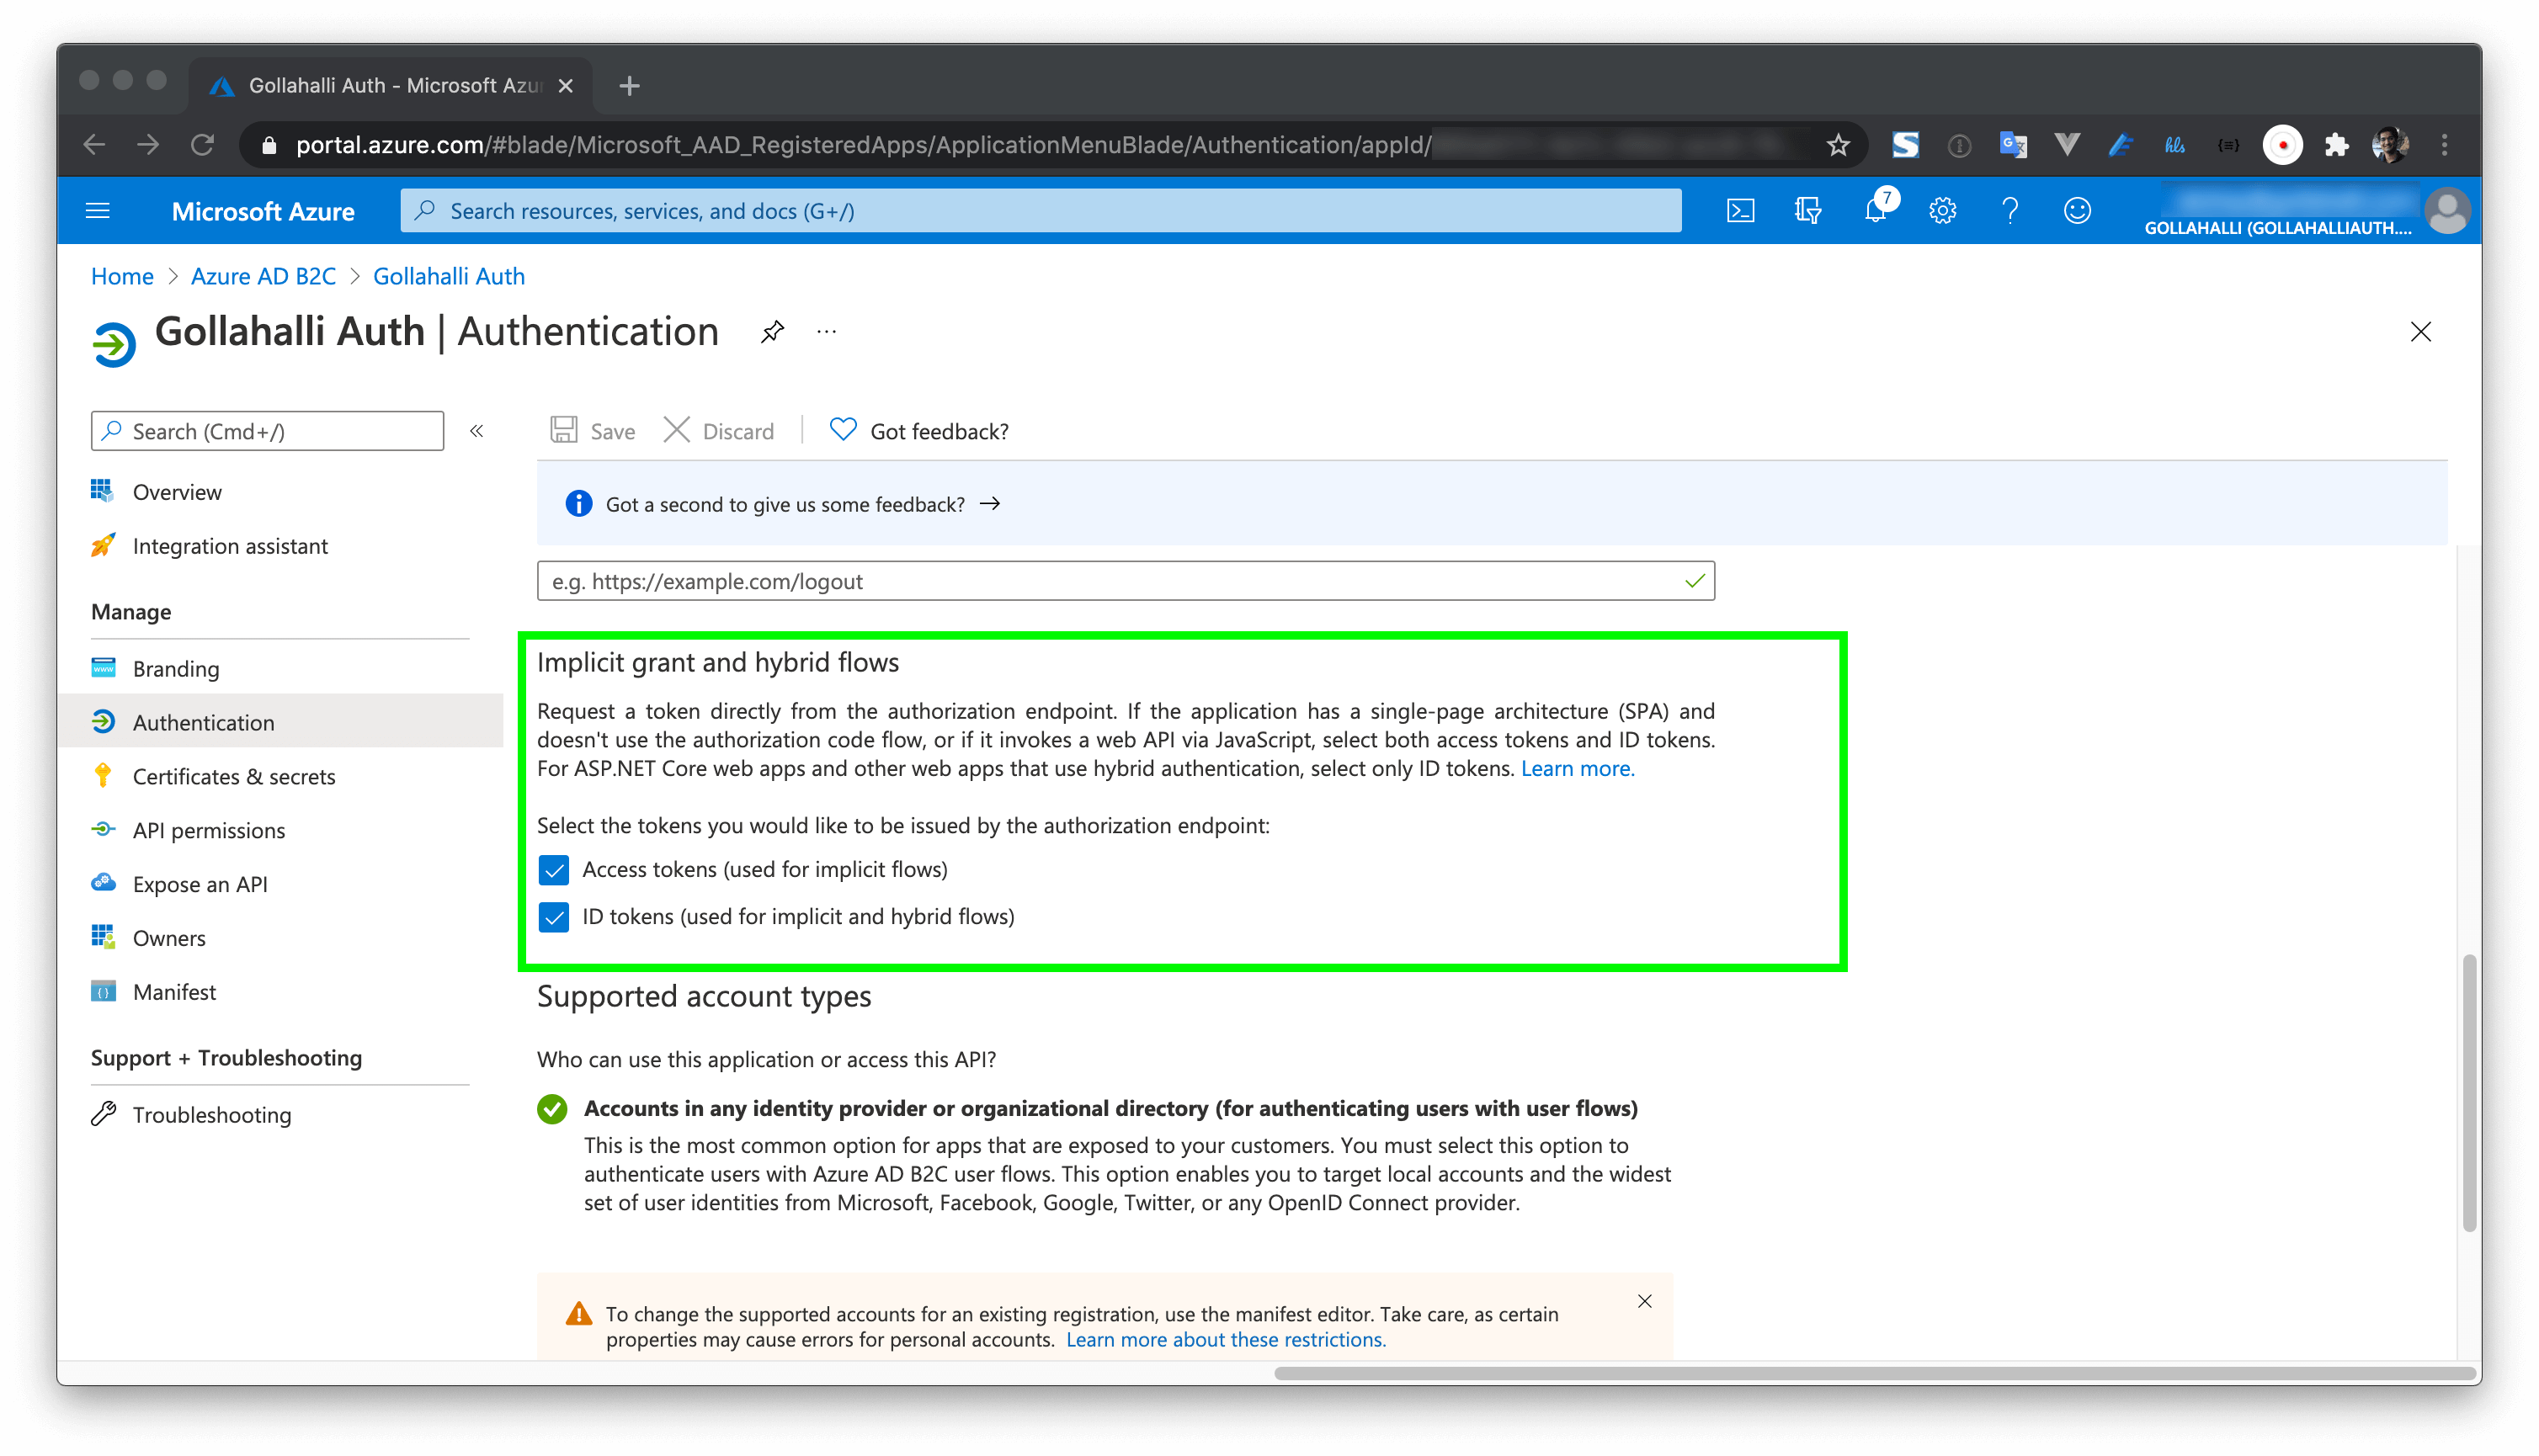
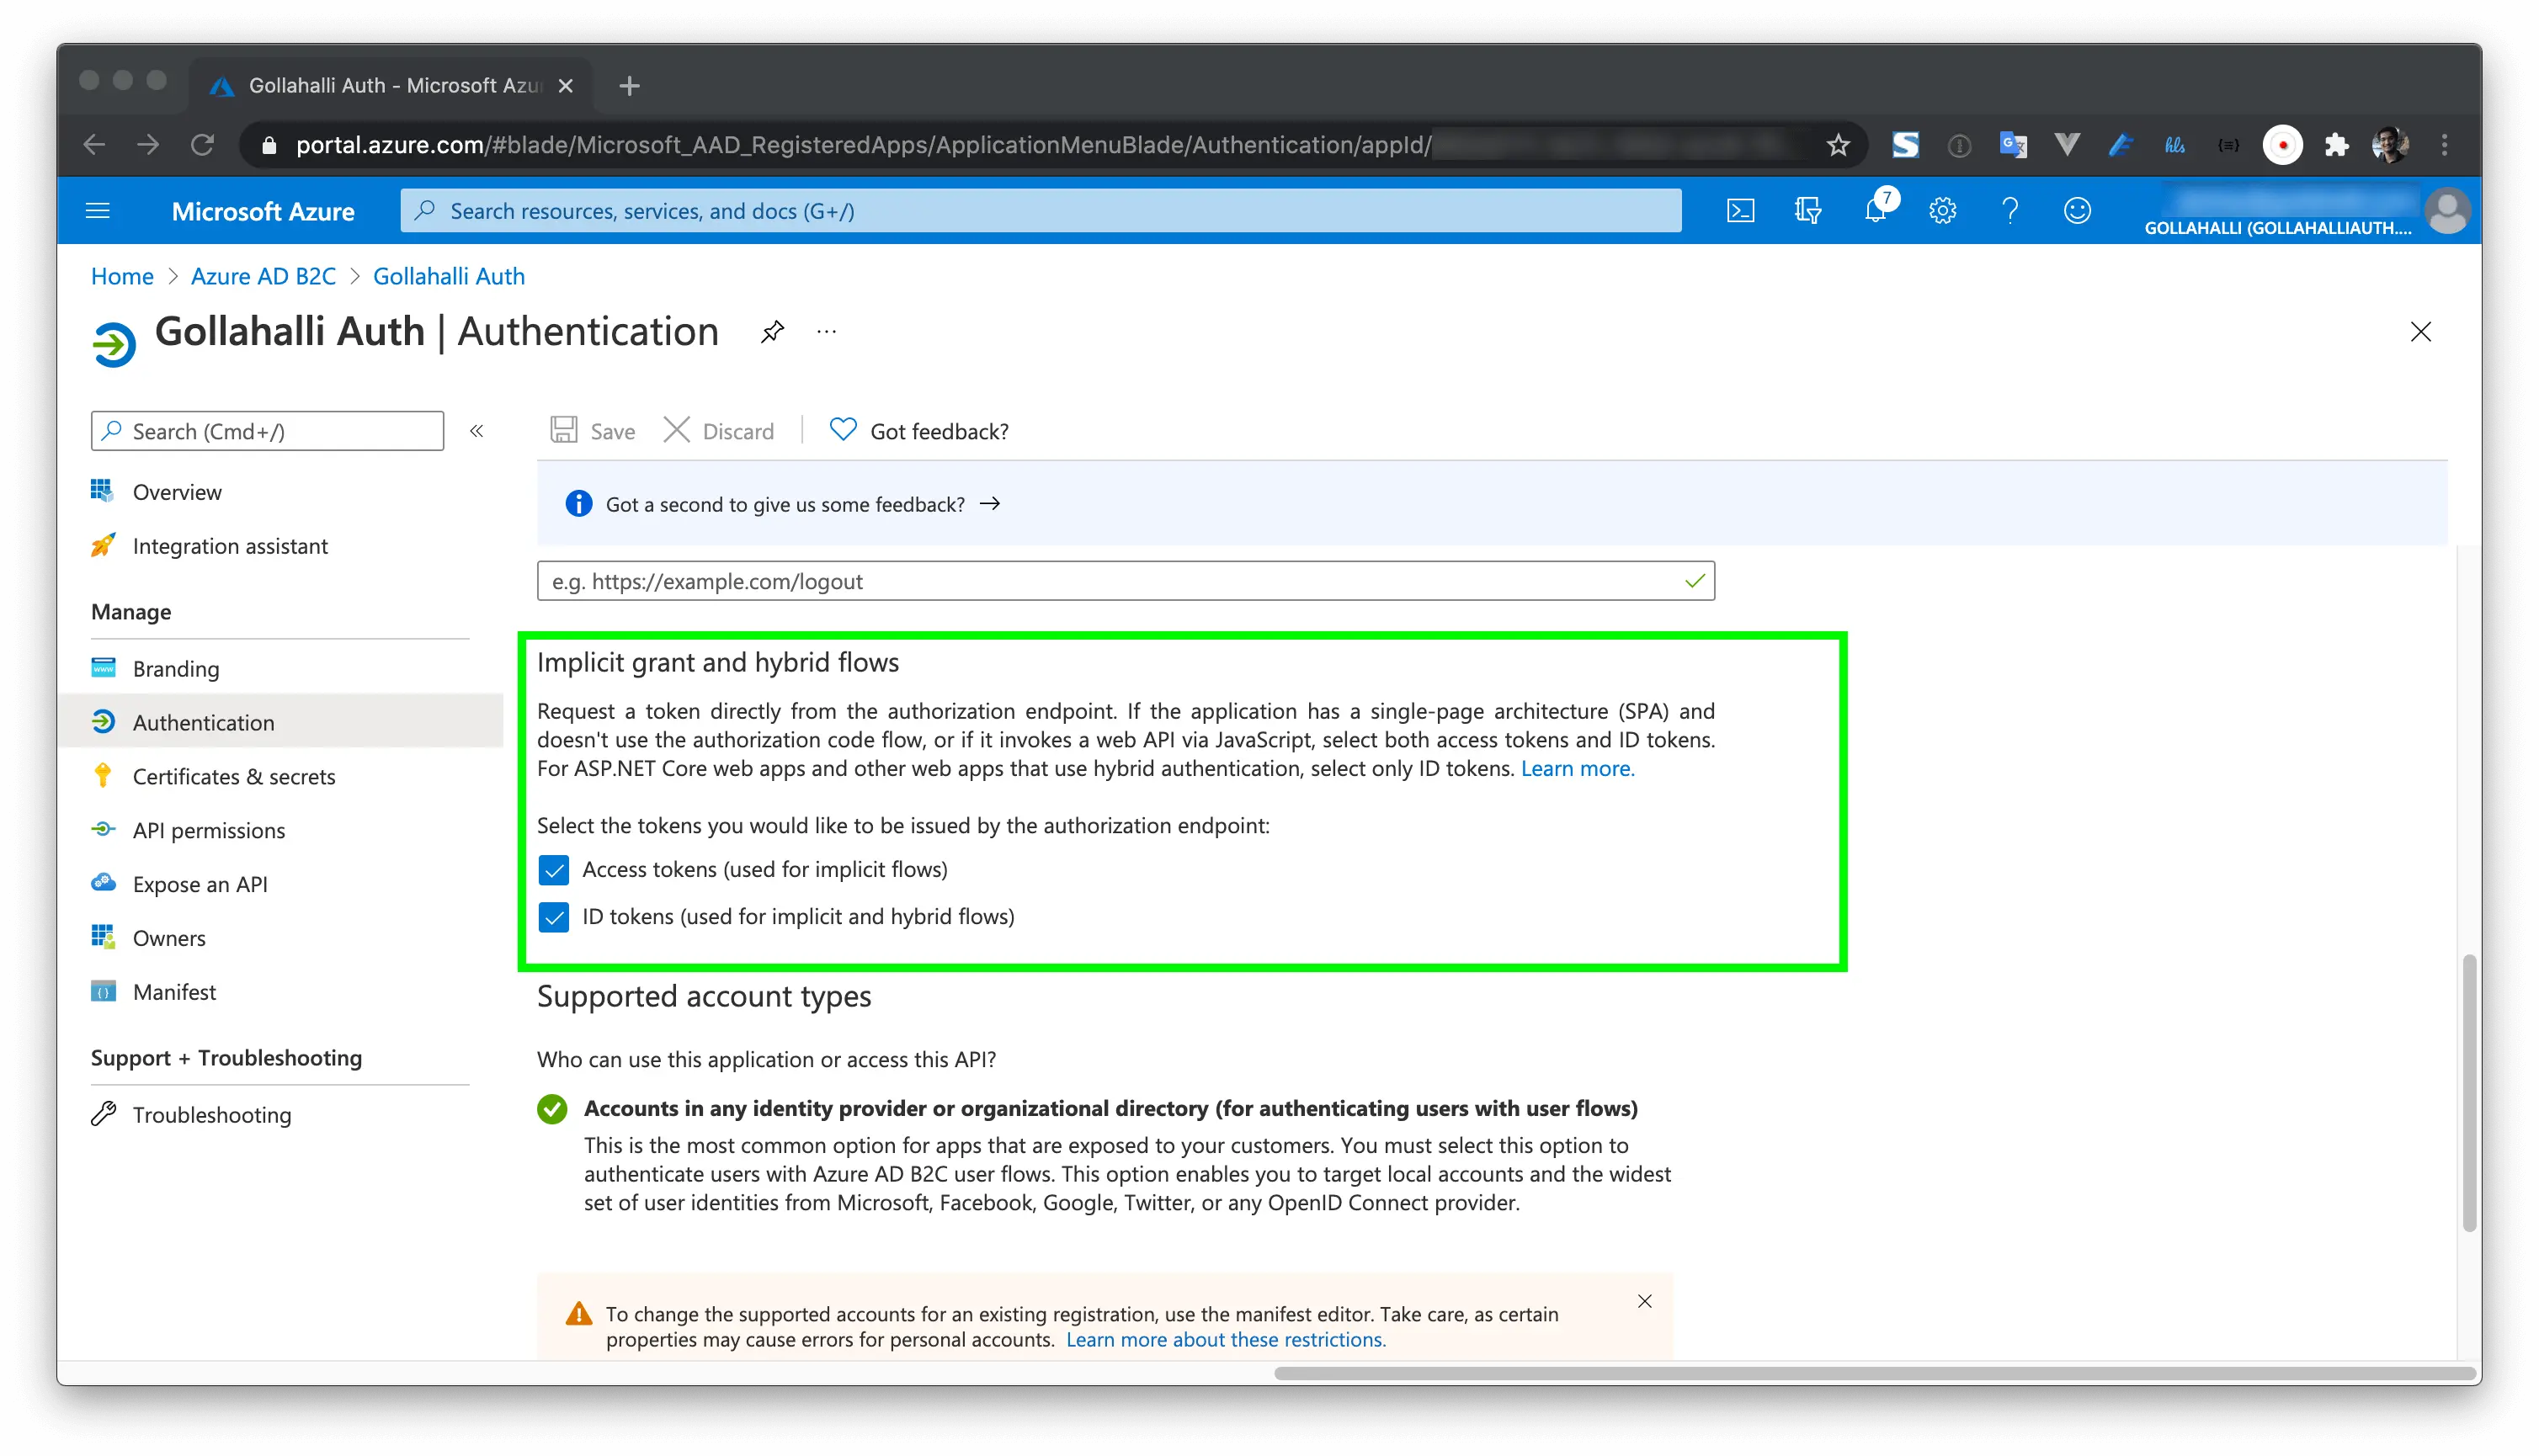
Also, in the same page, under Implicit grant and hybrid flows, make sure Access tokens and ID tokens are ticked.
Enable grants
Setup Postman
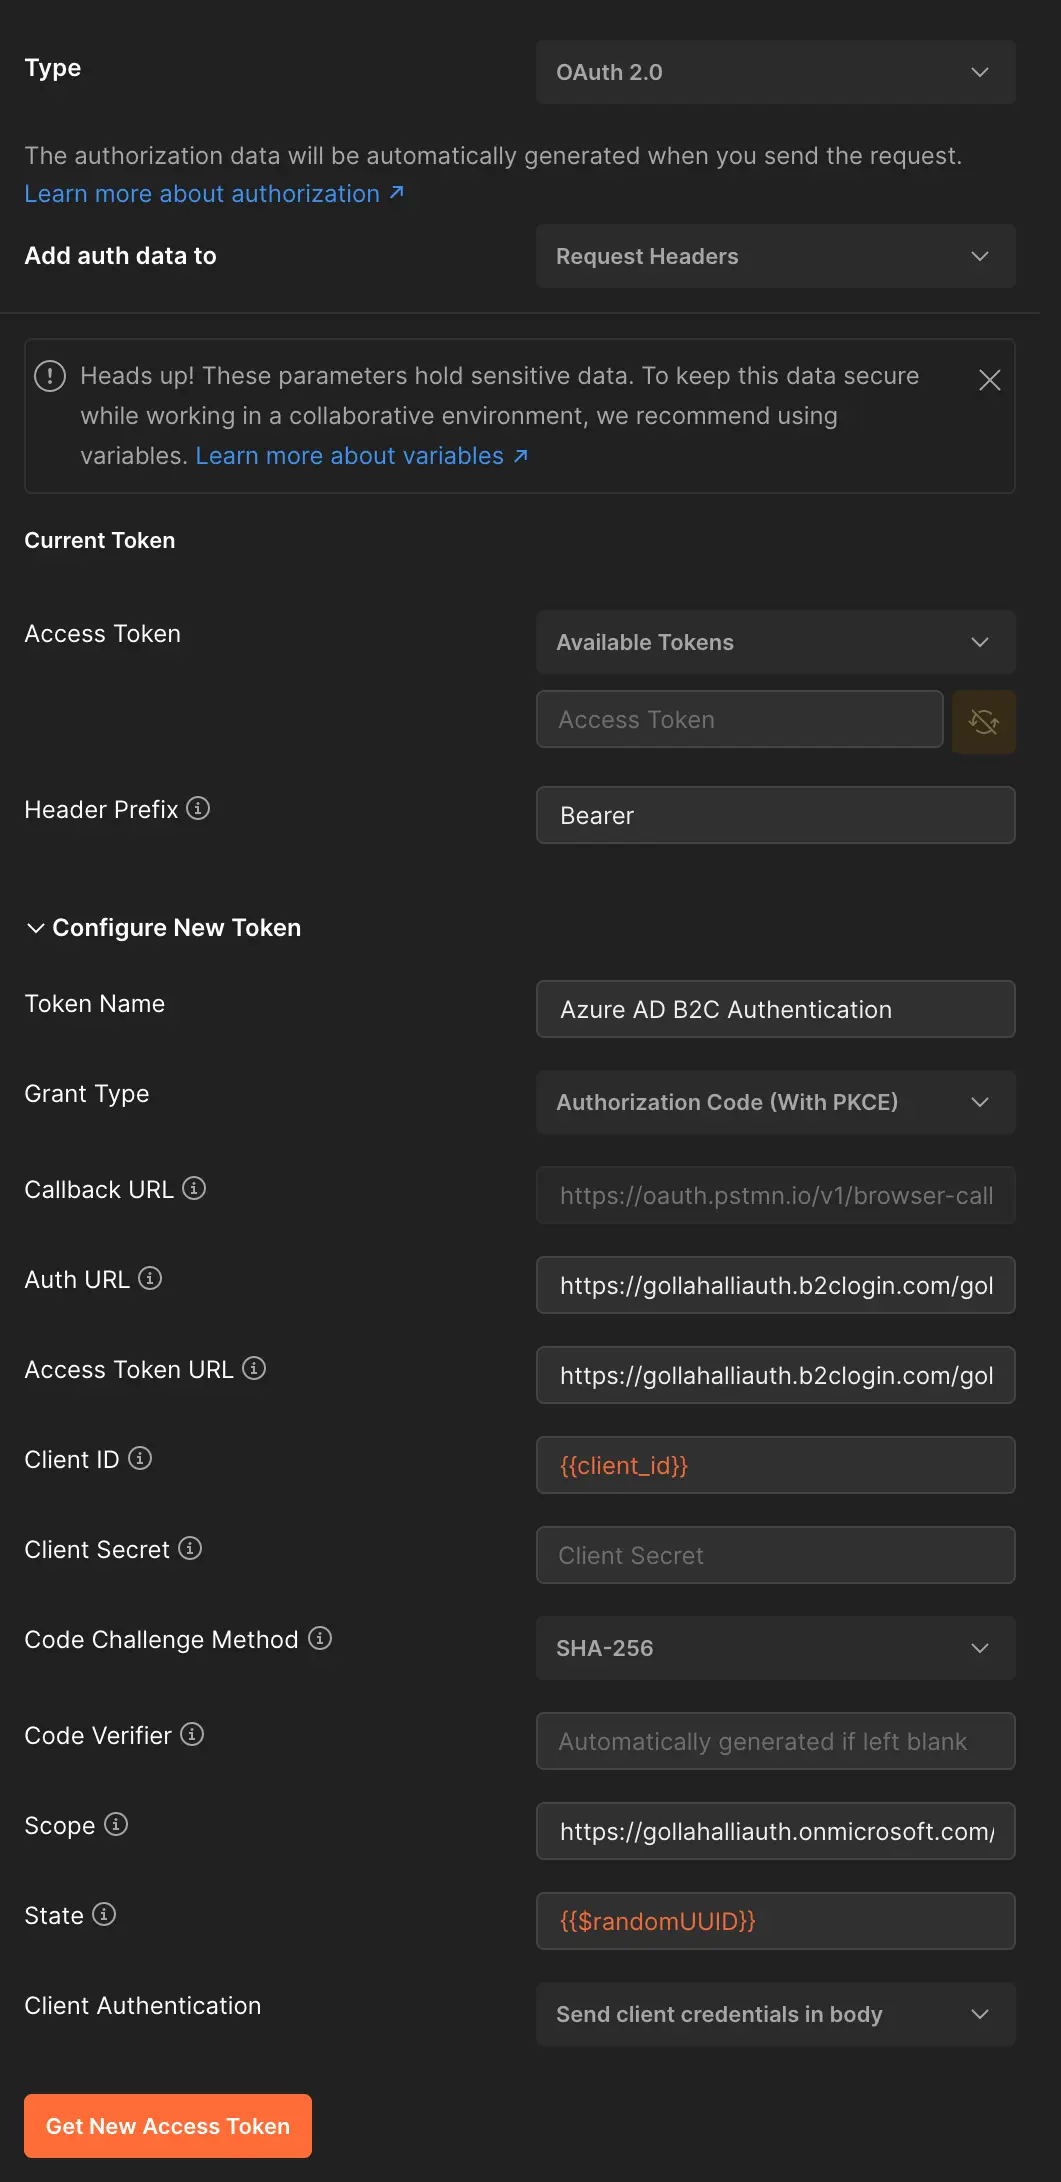
At this point make sure you know your endpoints for - authorize and token, mine is:
This should be empty so that Postman can generate one for you
Scope
<custom scope> openid profile offline_access
State
{{$randomUUID}}
$randomUUID generate a UUID V4
Client Authentication
Send client credentials in body
INFO
<custom scope> is the scope you have defined in your Azure AD B2C application. For example, I have defined two scopes - user.read and user.write, because these are custom you need to add them as a URL, in my case it is - https://gollahalliauth.onmicrosoft.com/api/user.read https://gollahalliauth.onmicrosoft.com/api/user.write. Custom scopes are defined in the API Permissions section of your Azure AD B2C application.
Screenshot
Screenshot of Postman authentication setup
Conclusion
These steps should be similar to other OAuth providers. Do give it a try and let me know if there is a space for improvements. I hope this article helps you in your development.
Updates
01/10/2023 - Added additional information about custom scopes
25/08/2023 - Updated the article to reflect the change in authentication flow