Creating Custom Widget for QListWidget in Qt 6
January 2, 2021 (Modified on November 28, 2022) • C++ Qt6 • 6 minutes to read • Edit

With the arrival of Qt 6 and the complete integration of CMake, I wanted to give Qt another try before I give up and go to Electron. So far it has been good.
I have been trying to create an app that uses QListWidget with custom widgets as a list, to list recently viewed files. The custom widget contains a label and a button, this button deletes itself on clicking. I had trouble connecting the child widget to the parent, and if you had the same problem then this article could help you.
The code can be found at https://github.com/akshaybabloo/qlistwidget-custom-widget
Some Basics
Let’s look at some basics before we dive into the project. If you are OK with the basics, move to the fun part.
What is Qt?
Qt (read as cute) is a cross platform UI development platform that formally supports C++, Python and Qt QML programming languages.
Qt License Restriction
Although Qt can be used by anyone, the company does have a stricter licencing program. If you are using the open-source version of Qt, you need to adhere to LGPL/GPL restrictions. Which basically means your source code should be open for others to view.
So, when choosing Qt as your next UI framework, make sure you know the licencing restriction.
What are Signals and Slots?
Signals & Slots are one of the key features in Qt that allows two objects to communicate without importing them into your class. We will look at how to use this in our code.
Why Qt?
Speed and performance. That is literally the only reason you want to use Qt. If that’s something you are not bothered with, I would recommend using Electron or JavaFX. See their website for more information.
Project Structure
Make sure you have installed the latest version of Qt 6. At the time of writing this article, I had Qt 6.0 installed. You can either use Qt Creator or CLion, both works great.
qlistwidget-custom-widget
├── CMakeLists.txt
├── customwidget.cpp
├── customwidget.h
├── customwidget.ui
├── main.cpp
├── mainwindow.cpp
├── mainwindow.h
└── mainwindow.ui
Main Windows
Let’s create a simple MainWindow class without a status bar and with all its margins & spacing set to 0. To this window, drag and drop the List Widget from the left pane.
Code
mainwindow.ui
<?xml version="1.0" encoding="UTF-8"?>
<ui version="4.0">
 <class>MainWindow</class>
 <widget class="QMainWindow" name="MainWindow">
  <property name="geometry">
   <rect>
    <x>0</x>
    <y>0</y>
    <width>250</width>
    <height>400</height>
   </rect>
  </property>
  <property name="windowTitle">
   <string>MainWindow</string>
  </property>
  <widget class="QWidget" name="centralwidget">
   <layout class="QHBoxLayout" name="horizontalLayout">
    <property name="spacing">
     <number>0</number>
    </property>
    <property name="leftMargin">
     <number>0</number>
    </property>
    <property name="topMargin">
     <number>0</number>
    </property>
    <property name="rightMargin">
     <number>0</number>
    </property>
    <property name="bottomMargin">
     <number>0</number>
    </property>
    <item>
     <widget class="QListWidget" name="listWidget"/>
    </item>
   </layout>
  </widget>
  <widget class="QMenuBar" name="menubar">
   <property name="geometry">
    <rect>
     <x>0</x>
     <y>0</y>
     <width>250</width>
     <height>22</height>
    </rect>
   </property>
  </widget>
 </widget>
 <resources/>
 <connections/>
</ui>
Screenshot
This should look similar to the image below on macOS with dark mode enabled.
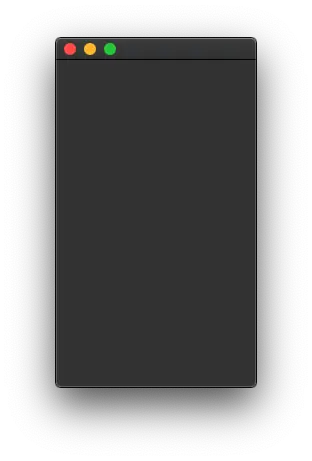
Main window with empty QListWidget.
Custom Widget
Create a new widget UI with class CustomWidget. Add a button and a label to it from the left pane.
Code
customwidget.ui
<?xml version="1.0" encoding="UTF-8"?>
<ui version="4.0">
 <class>CustomWidget</class>
 <widget class="QWidget" name="CustomWidget">
  <property name="geometry">
   <rect>
    <x>0</x>
    <y>0</y>
    <width>250</width>
    <height>60</height>
   </rect>
  </property>
  <property name="windowTitle">
   <string>Form</string>
  </property>
  <layout class="QHBoxLayout" name="horizontalLayout">
   <item>
    <widget class="QLabel" name="label">
     <property name="text">
      <string>TextLabel</string>
     </property>
    </widget>
   </item>
   <item>
    <spacer name="horizontalSpacer">
     <property name="orientation">
      <enum>Qt::Horizontal</enum>
     </property>
     <property name="sizeHint" stdset="0">
      <size>
       <width>40</width>
       <height>20</height>
      </size>
     </property>
    </spacer>
   </item>
   <item>
    <widget class="QToolButton" name="closeButton">
     <property name="text">
      <string>x</string>
     </property>
    </widget>
   </item>
  </layout>
 </widget>
 <resources/>
 <connections/>
</ui>
Screenshot
This should look similar to the image below on macOS with dark mode enabled.
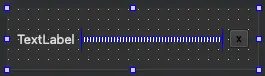
Widget with button, label, and a horizontal spacer.
Let’s Code
Let’s get into the fun part of this article - coding. Our main.cpp calls MainWindow object from mainwindow.h, which is the parent window. Let’s ignore main.cpp because we are not going to make any changes to it.
customwidget.cpp and customwidget.h
customwidget.cpp and customwidget.h
To the generated code, lets add two public methods - QString getText(), void setText(const QString &text) - one signal method - void sendRemoveItem(const QString &text) - and one slot method - void on_toolButton_clicked().
void setText(const QString &text)
This method sets the text of the QLabel in the UI, whose name is given as label.
void CustomWidget::setText(const QString &text) {
    ui->label->setText(text);
}
QString getText()
As the method name suggests, it returns the QLabel from the UI
QString CustomWidget::getText() {
    return ui->label->text();
}
void sendRemoveItem(const QString &text)
This method is a signal that is used to emit a signal to an objects Slot.
void on_toolButton_clicked()
This is a slot method that reacts to the button - x - click on the UI. When the button is clicked, we can use emit to send the text to the required method.
void CustomWidget::closeButtonClicked()
{
    emit sendRemoveItem(ui->label->text());
}
We will come back to this method once we write the remaining methods in
mainwindow.h
mainwindow.cpp and mainwindow.h
mainwindow.cpp and mainwindow.h.
mainwindow.cpp and mainwindow.h are the entry points for UI, so we have to assign the CustomWindow object to QListWidget whose name in UI is listWidget. In this object we need to add some code to the constructor that creates new widgets and a private slot method - void removeItem(const QString &text) that receives a remove signal.
Add Code to Constructor
First import the custom widget - #include "customwidget.h"
In the MainWindow constructor add in the following code:
MainWindow::MainWindow(QWidget* parent)
    : QMainWindow(parent)
    , ui(new Ui::MainWindow)
{
    ui->setupUi(this);

    // Creates a list of custom widgets
    for (int i = 0; i < 5; ++i) {
        auto item = new QListWidgetItem();

        auto widget = new CustomWidget(this);
        widget->setText(QString("text %1").arg(i));

        item->setSizeHint(widget->sizeHint());

        ui->listWidget->addItem(item);
        ui->listWidget->setItemWidget(item, widget);
    }
}
void removeItem(const QString &text)
The &text is the QLabel text assigned to each instance of the widget while creating it. When the x button is clicked, the text is emitted to this method.
void MainWindow::removeItem(const QString& text)
{
    for (int i = 0; i < ui->listWidget->count(); ++i) {
        auto item = ui->listWidget->item(i);
        auto itemWidget = qobject_cast<CustomWidget*>(ui->listWidget->itemWidget(item));
        if (itemWidget->getText() == text) {
            delete ui->listWidget->takeItem(i);
            break;
        }
    }
}
The above code matches the text and deletes the item from the listWidget.
Connecting CustomWidget to MainWindow
Remember we spoke about Slots & Signals, this is where we use that concept to connect CustomWidget object to MainWindow object.
In the constructor of CustomWidget write in the following code:
CustomWidget::CustomWidget(QWidget* parent)
    : QWidget(parent)
    , ui(new Ui::CustomWidget)
{
    ui->setupUi(this);

    // Send the label text to MainWindow's removeItem method
    connect(this, &CustomWidget::sendRemoveItem, qobject_cast<MainWindow*>(parent), &MainWindow::removeItem);

    // Connect close button clicked to closeButtonClicked method
    connect(ui->closeButton, &QPushButton::clicked, this, &CustomWidget::closeButtonClicked);
}
What we are saying here is - connect current class (CustomWidget) whose object is sendRemoveItem to the parent (MainWindow) whose object is removeItem() and the second connect describes the same thing for the close button.
Run the Application (GIF)
Once you run the application you should be able to delete any item from the list:
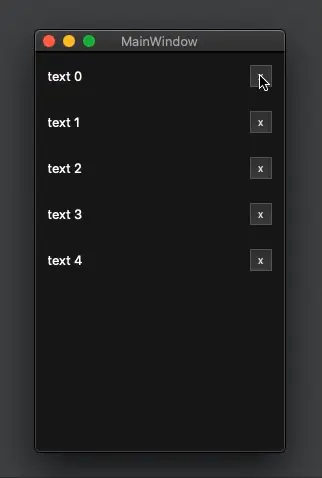
Application demo.
Conclusion
This article might be overwhelming, but there are only few parts of the code that actually matter - creating the UI, using the UI components, and connecting them together - rest are automatically generated by the Qt Creator. If you happen to come across a better alternative, please do comment below.
Happy coding! 😄
Updates
- 28/11/2022 - Updated the code to Qt 6.4.0, used object connections instead of
SIGNALandSLOTmacros and replaceddynamic_castwithqobject_cast. See commit for more details.
